Understanding Color Grading vs Color Correction
In the realm of video production, two crucial processes play a pivotal role in achieving a visually appealing final product: color grading and color correction. These two terms are often used interchangeably, but they serve distinct purposes and require unique skill sets.
In this comprehensive guide, we delve into the world of color grading and color correction, shedding light on their differences, techniques, and the impact they have on your video projects.
Understanding the Basics
What is Color Grading?
Color grading is a post-production process that involves altering the colors in a video to create a specific mood, atmosphere, or style. It’s an artistic endeavor that goes beyond mere correction, allowing you to add a unique signature to your video content.
The Essence of Color Correction
Color correction, on the other hand, is the process of adjusting the colors in a video to achieve a balanced and natural look. It corrects issues like exposure, white balance, and contrast, ensuring your video looks true to life.
Key Differences
Color Grading: Unleashing Creativity
Color grading is where the magic happens. This process enables you to set the tone and style of your video, making it a powerful storytelling tool. Here’s how it differs from color correction:
-
Artistic Expression: Color grading allows you to express your creativity by applying various color filters, tints, and styles to evoke specific emotions.
-
Enhanced Narrative: It enhances the narrative of your video, emphasizing key moments and creating a visual connection with your audience.
-
Matching Aesthetic: Color grading ensures your video maintains a consistent and appealing aesthetic, which can be vital for branding.
Color Correction: Achieving Balance
While color grading is about creative expression, color correction is all about achieving technical perfection. Here’s how it differs:
-
Technical Precision: Color correction addresses issues like color imbalances, exposure problems, and unwanted color casts to ensure a technically sound video.
-
Natural Appearance: It focuses on making the video look as natural as possible, which is essential for documentary-style content or authentic storytelling.
-
Restoring Quality: Color correction can help salvage poorly shot footage, transforming it into usable material.
The Workflow
Color Correction Workflow
- Normalize your footage:
start by normalizing your footage as much as possible. This means ensuring that your video’s exposure and color balance are as close to neutral as they can be. Correct any exposure issues and eliminate unwanted color casts for a solid foundation.
- Saturation enhancement
in the second step, focus on enhancing the saturation of your footage. This ensures that your colors pop and come to life. Adjust the saturation to strike the right balance, making your visuals more vibrant and engaging.
- Optimize brightness and contrast
after dealing with saturation, it’s time to optimize brightness and contrast. Achieving the perfect balance between shadows and highlights enhances the overall visual appeal of your video. Adjust these settings for a dynamic and captivating look.
- Set your new white balance
white balance is critical in ensuring your colors appear accurate and natural. Adjust the white balance settings to eliminate any unwanted color tints, making sure whites appear truly white. This step adds a professional touch to your footage.
- Skin tone perfection
lastly, double-check your skin tones. It’s essential to ensure that skin tones look natural and flattering. Correct any inconsistencies to create a polished, professional finish.
While these five steps provide a strong foundation for color correction, remember that the process can be more extensive and nuanced, depending on your footage and experience. However, for beginners and those looking to quickly balance and correct regular footage, these steps will set you on the right path. Mastering color correction is an art, and with practice and skill, you can elevate your video content to the next level.
Color Grading Workflow
- Normalize your footage:
before delving into color grading, it’s essential to normalize your footage as much as possible. This involves rectifying exposure issues and eliminating any undesirable color casts. It sets the stage for a clean slate to work from.
- Color correction
the next step is color correction. Correct any color imbalances, exposure problems, and contrast issues. This step ensures that your footage looks true to life and provides a solid foundation for the grading process.
- Define your desired look and style
now, it’s time to define the look and style you want to achieve. Consider the mood and atmosphere you wish to convey in your video. This step is where the magic of color grading happens, as you apply filters and effects to bring your creative vision to life.
- Make precise color adjustments
in this step, you’ll make precise color adjustments within your chosen editing program. Fine-tune the colors to match your desired look, paying attention to highlights, shadows, and mid-tones. This step is essential for achieving a visually stunning result.
- Double-check skin tones and vectorscope
as a final check, ensure that skin tones appear natural and flattering. The vectorscope is a valuable tool for analyzing color accuracy. Make any necessary refinements to create a polished and professional finish.
Remember, the key to successful color grading is to begin with normalized and corrected footage. This ensures that you’re working with a true representation of your content before applying the creative touch of color grading. With these five steps, you’ll have the guidance to elevate your video footage and present it exactly as you envision it
Advantages of Mastering Both
While color correction and color grading serve distinct purposes, the best results are often achieved when both techniques are mastered and combined. This synergy allows you to produce videos that are not only visually appealing but also technically flawless.
How can I tell if I need Color Correction or Color Grading?
As a video enthusiast or professional, the question of whether your footage requires color correction or color grading is a common dilemma. To create visually stunning videos, it’s crucial to understand which process your footage truly needs. In this guide, we’ll help you determine the right path for your specific content.
Assessing Your Footage
The first step in deciding between color correction and color grading is to assess your footage carefully. Here’s how to do it:
1. Review the Raw Footage
Start by closely examining your raw footage. Look for any issues that might affect the overall quality of the video. Pay attention to:
- Exposure: Is the video too bright or too dark? Are there blown-out highlights or crushed shadows?
- Color Balance: Are there noticeable color casts, such as an overly warm or cool tone?
- Contrast: Does the footage lack contrast, making it appear flat, or is it overly contrasted, leading to loss of detail?
2. Consider Your Creative Vision
Think about the style and mood you want to convey through your video. Do you have a specific look in mind, or do you want the footage to appear as natural as possible? Your creative intentions will guide your decision.
When to Choose Color Correction?
Color correction is the ideal choice when your primary concern is fixing technical issues in your footage. Here are some situations where color correction is necessary:
Exposure Problems: If your footage suffers from underexposure (too dark) or overexposure (too bright), color correction can help restore balance.
White Balance Issues: When there are noticeable color temperature problems, such as a yellow or blue tint, color correction can correct these errors.
Contrast and Saturation: If your video lacks depth due to low contrast or oversaturation, color correction can bring it back to a natural look.
When to Opt for Color Grading?
Color grading is the way to go when you want to add an artistic and creative touch to your footage. Here’s when color grading is essential:
Creative Style: If you have a specific mood or style in mind, color grading allows you to apply filters and effects to achieve that vision.
Narrative Emphasis: For storytelling videos, color grading can be used to enhance specific scenes, making them stand out and resonate with your audience.
Consistent Aesthetic: When maintaining a consistent look is essential for branding or series of videos, color grading ensures your content adheres to your chosen aesthetic.
A Balanced Approach
In many cases, the best results come from combining both color correction and color grading. This balanced approach ensures that your videos are not only visually appealing but also technically flawless. Color correction paves the way for color grading by providing a solid foundation for your creative enhancements.
Exploring the Best Tools for Color Grading and Color Correction
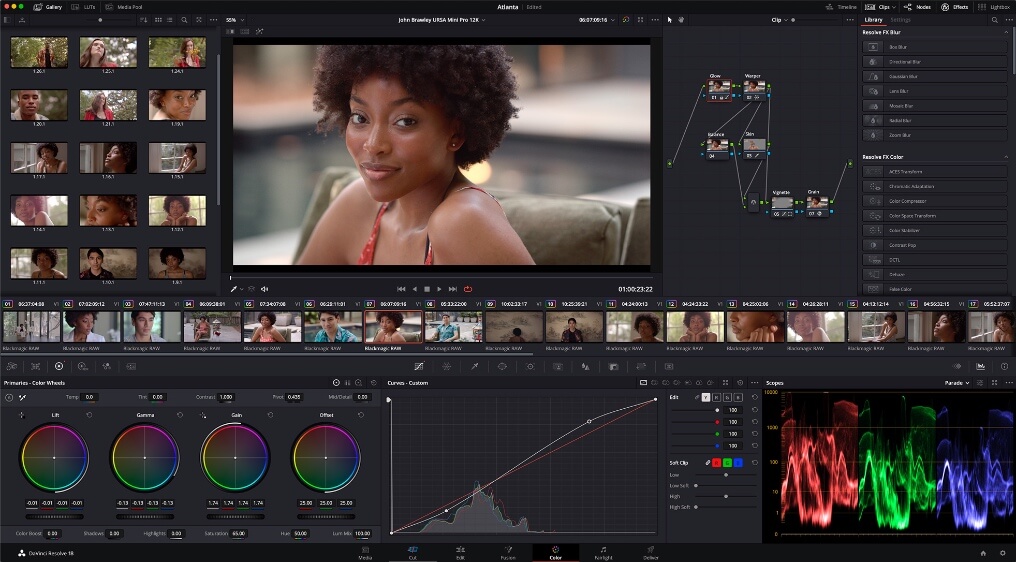
When it comes to enhancing the visual appeal of your videos, mastering the art of color grading and color correction is essential. But to do this effectively, you’ll need the right tools at your disposal. In this guide, we’ll dive into the top software and applications that professionals use for color grading and color correction.1. DaVinci Resolve
DaVinci Resolve is a powerful and versatile software designed specifically for color correction and grading. It offers a free version that provides professional-grade tools for enhancing your videos. DaVinci Resolve’s node-based color correction system allows for precise adjustments, and it’s a top choice for those who want to take their color work to the next level.
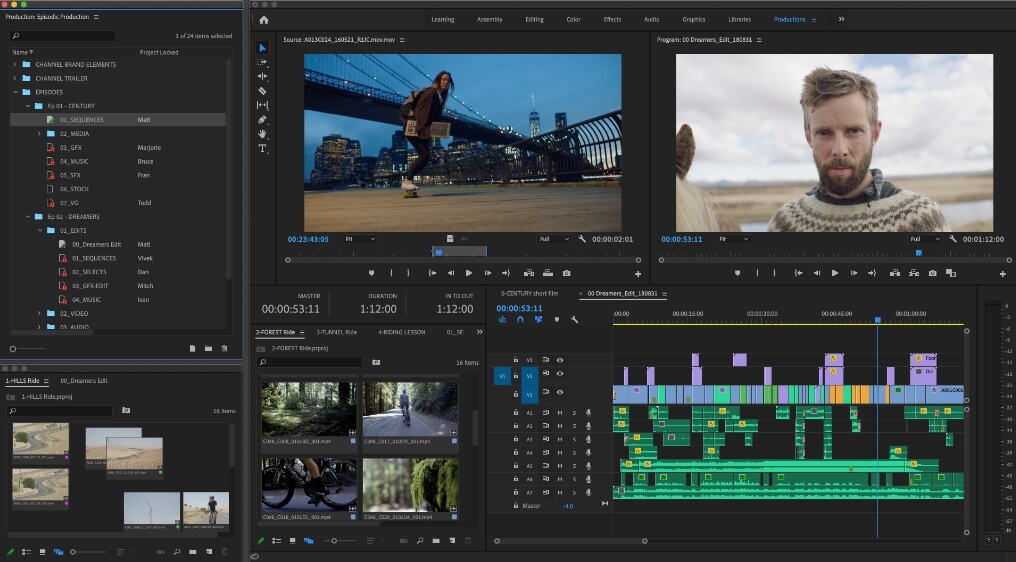
2. Adobe Premiere Pro
Adobe Premiere Pro is a go-to choice for video editors worldwide. It’s known for its robust set of color correction tools, making it a fantastic option for achieving the perfect balance in your footage. With features like Lumetri Color, you can easily correct exposure, adjust color balance, and fine-tune saturation to create a visually stunning video.
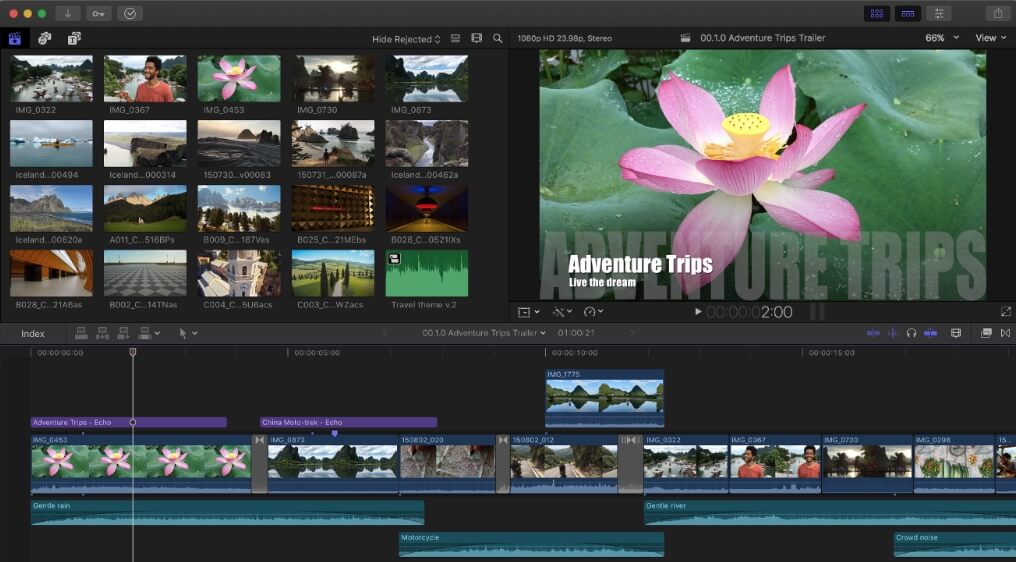
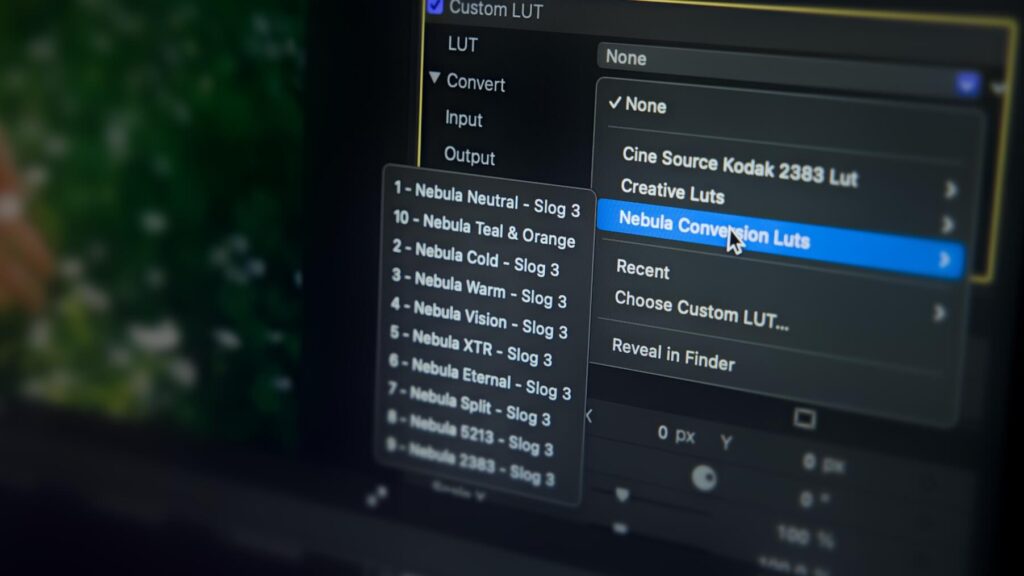
3. Final Cut Pro X
For Mac users, Final Cut Pro X is an excellent option. It features a wide array of color correction tools, including color wheels, curves, and precise color sampling. Whether you’re a professional videographer or an amateur filmmaker, Final Cut Pro X has the features to help you achieve the perfect look for your videos.
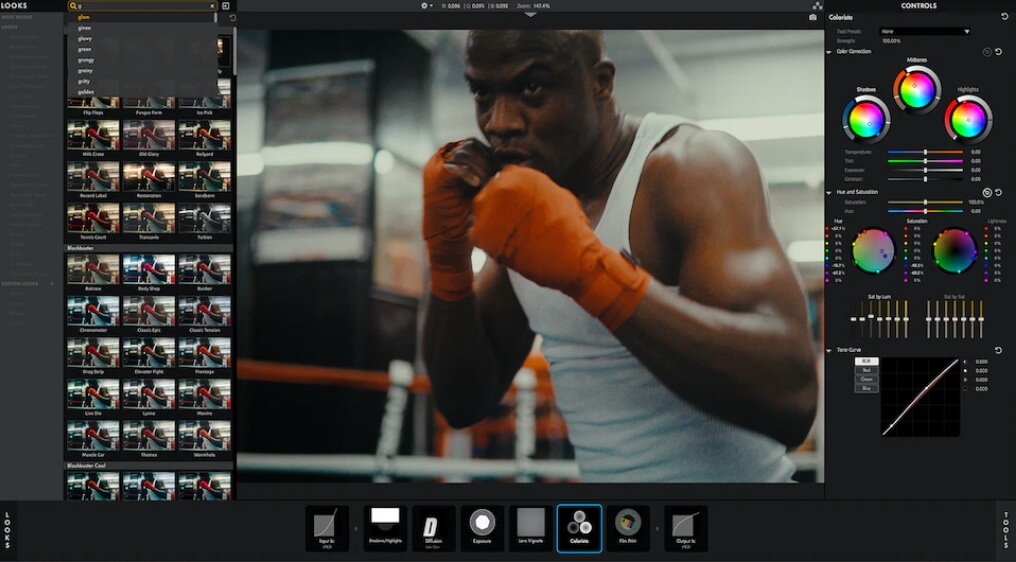
4. Magic Bullet Colorista
Magic Bullet Colorista is a widely acclaimed color grading tool known for its simplicity and effectiveness. It offers a user-friendly interface that allows you to make quick and precise color adjustments. Whether you’re a novice or a pro, Magic Bullet Colorista is a valuable asset for achieving that perfect look in your videos.
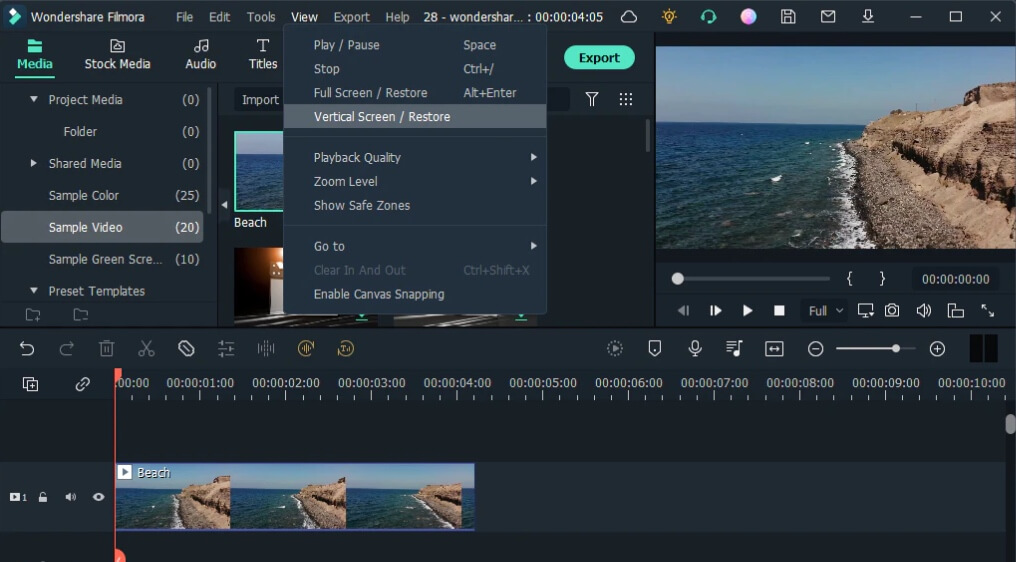
5. Filmora
If you’re just starting with video editing, Filmora offers an intuitive and user-friendly platform for color correction and grading. It’s a great option for beginners and hobbyists who want to enhance their videos without a steep learning curve.


2 Responses
When working on a commercial project, how do you balance the creative aspects of color grading and correction with the client’s specific requirements and expectations? What strategies or techniques do you employ to ensure the final product meets both artistic and commercial objectives?
Dear Robert,
Balancing creative color grading and correction with commercial projects is a nuanced endeavor. It begins with a comprehensive understanding of the client’s brand, objectives, and target audience. Through in-depth discussions and the client’s branding guidelines, we lay the foundation for our creative color choices. These discussions encompass specific color palettes, mood, and emotions that the client wishes to convey, ensuring alignment between creative decisions and the brand’s identity.
Incorporating color correction and grading into commercial projects entails enhancing visual appeal while adhering to the project’s core message. The process starts with technical adjustments through color correction, ensuring proper exposure, white balance, and consistency across all shots. Then, color grading comes into play, allowing us to infuse the project with the desired mood and style. Maintaining transparent communication with the client is key. We often share color samples and references to keep us on the same page, with ongoing flexibility to accommodate client feedback while also providing professional insights to optimize the visuals. The ultimate goal is to create content that resonates with the audience, effectively communicates the message, and aligns with the client’s commercial objectives. Striking this balance is the hallmark of a successful commercial colorist.
Thank you for your response and good luck with your project!